Hi friends, I felt ecstatic after recieving so many beautiful comments and messages on my last post and video in which I featured the viva decor Inka golds.
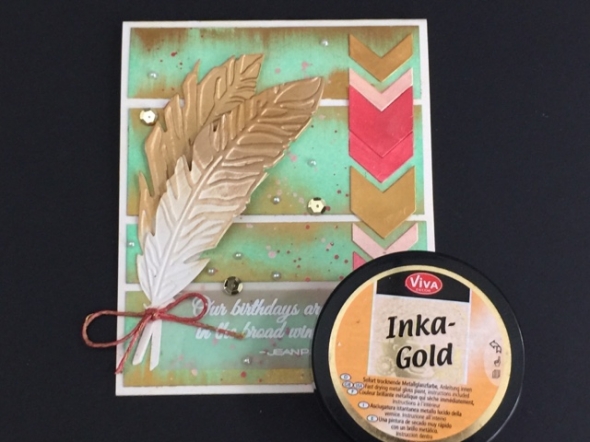
The last experience with the product was amazing so I decided to use it one more time and try few more tips n tricks. I personally love creating cards because they are quick and give me 100% happiness but I want to mention all the steps can be very easily used to create layouts,tags and altered art. So let's begin today's project and the things u will need are : Inka gold -gold Inka gold - lava red Inka gold - apricot Distress ink -cracked pistachio Sizzix feathers die Mini ink blending tool Tonic trimmer Craft mat ATG (glue) Tombow glue Vellum Versa mark Super fine detailed white EP Pearls /sequence So guys !!grab all the supplies and let's start it together :)
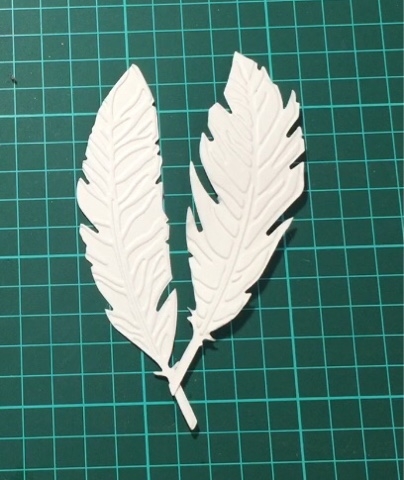
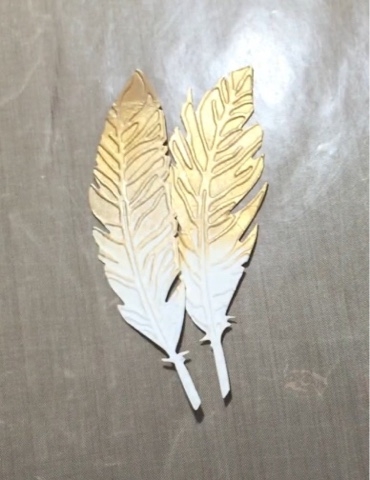
Step1: die cut and emboss the feather from a white card stock and add gold on the tips fading downwards.
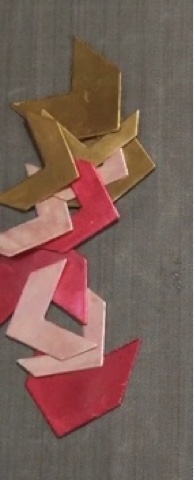
Step 2:die cut the arrows and paint them with red ,gold and apricot inka golds
Step 3: ink the card panel with cracked pistachio by using the mini foam blending tool. Apply two coats to get a more solid and even coverage . 😊TIP: always use the craft mat when you work with paints and inks. It is heat proof stain poof and super easy to clean
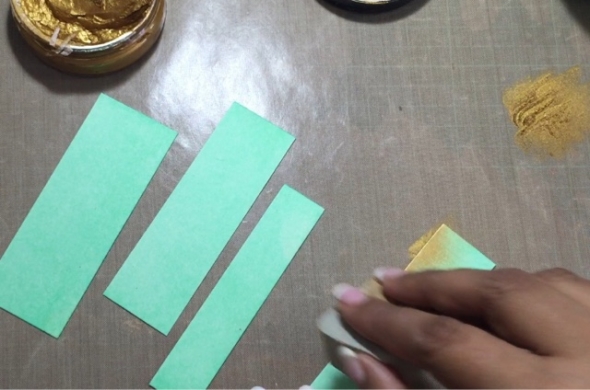
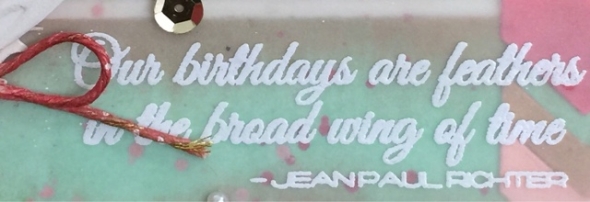
Step 4: cut the coloured panel into four stripes of different thicknesses. Now start adding little strokes of gold using a small piece of foam. This will give it a beautiful golden distressed look. Step 5: i embossed a sentiment on some vellum card stock using super fine white embossing powder. 😊TIP:It is always a good idea to use a powder tool to remove any static /oil/ or debris which might attract the EP. This makes the EP stuck only to the versa mark:)
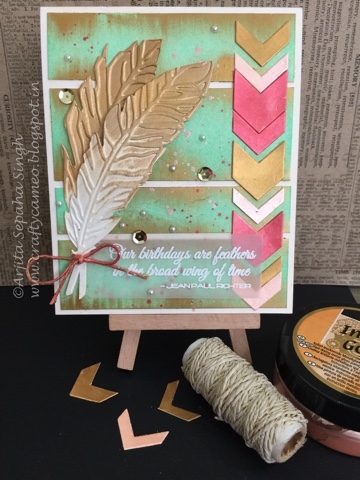
Finally we all all set to assemble the card together.try different arrangements and then stick them the way you liked the most. I added few flat back pearls and gold seqence to jaa up the project.
Here is the video link which shows you each and every step to make this beautiful card.
video


;)
;)
;)
;)